Kees Staal's Jaguar XJ6 Series 2 Restoration

Read the full write-up at My Jaguar XJ6 Series 2 Restoration ↗
 Photo: My Jaguar XJ6 Series 2 Restoration
Kees Staal's blog restoring a Jaguar XJ6 Series 2 in Brussels
This blog follows owner Kees Staal's hands-on maintenance and restoration of his Jaguar XJ6 Series 2, nicknamed the Green Lady, based in Brussels. Entries cover interior renewal, rubber and chrome trim, fluid changes, brake work and small mechanical fixes, often done with friends and family helping out. It is a personal diary style record rather than a full structured rebuild log.
Parts used
Parts named as used in the original write-up, grouped the way the Parts page groups them. Where one of the shops we index lists the same thing for this car, it is shown underneath with a link to the shop.
Engine 3
- Engine oilAnglo Parts
Full engine oil renewal performed
- Oil filterAnglo Parts
Replaced during the oil renewal, accessed from underneath the car
In the shops Herald and Spitfire Spin-On Oil Filter ↗
 TRGB· £5.45 GBP
 Inline Fuel Filter ↗TRGB· £8.95 GBP
 K&N Air Filter Cleaner ↗TRGB· £15.35 GBP
- Air filter
Restored air filter refitted
Gearbox & Drivetrain 2
- Differential oilAnglo Parts
Differential oil changed as part of fluid renewal
- Automatic transmission fluidAnglo Parts
ATF renewed during the fluid service
In the shops Brake Fluid DOT4 1 Litre ↗TRGB· £14.85 GBP
 Automatic Transmission Seals & Filters ↗
 Moss Motors – Triumph TR6/TR250· $0.00 USD
 O-Rings for XJ-40 Automatic Transmission ↗Moss Motors – Triumph TR6/TR250· $10.39 USD
Brakes 1
- Master cylinder seal kit and brake tubing
Rubber seals and brake-oil resistant tubing replaced after master cylinder leak, then bled with help
In the shops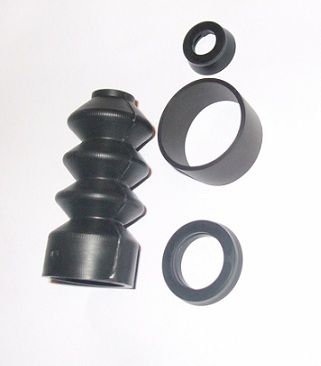 Brake Master Cylinder Repair Seals Kit (Riley Pathfinder, 1953-57) ↗
 Other Classic Car Parts Wolseley 1500 Saloon Car Parts· £15.00 GBP
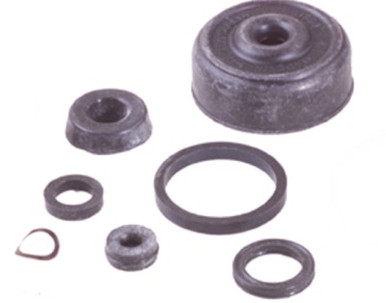 Brake Master Cylinder Kit - Spitfire 1967-75 ↗
 bpnorthwest.com· $19.97 USD
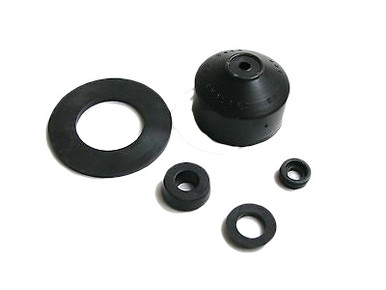 Brake Master Cylinder Kit (Spitfire '62-'66) ↗bpnorthwest.com· $12.85 USD
Body & Trim 3
- Chrome fine stripeClassic Car Parts, Brussels
Chrome-plastic self-adhesive stripe fitted along the body in place of original gold stripe
In the shops Chrome Cup Washer, No.8 ↗TRGB· £0.20 GBP
 Dashboard Screw, Chrome ↗TRGB· £0.94 GBP
 Screw, 4BA Chrome Countersunk ↗TRGB· £0.39 GBP
- Valma chrome cleanerValma
Used to polish and restore shine to chrome trim
- Polyester epoxy fillerDIY store
Used to repair rust found around the rear window aperture and to seal leaks
Interior 4
- Headlining kitSNG Barratt
New headlining fabric and glue fitted to replace deteriorated original
- Egalbase sound-damping carpetCarpet Right Oosterhout
Used for sound insulation carpeting in the cabin
In the shops NA/NB Chassis Sound Damping Kit ↗
 Flyin' Miata· $69.99 USD
 Under Carpet Sound Insulation Kit ↗Moss Europe (UK)· £66.00 GBPDEI NA/NB Chassis Sound Damping Kit ↗Flyin' Miata· $69.99 USD
- Door and console armrestsJag Parts & Cars
Left door armrest, mid-console and front door armrests sourced and fitted
In the shops Door Lock Gasket ↗TRGB· £0.72 GBP
 Ital Style Door Mirror ↗TRGB· £29.95 GBP
 Door Glass Mechanism Clip ↗TRGB· £2.15 GBP
- Gliptone leather smell plateGliptone
Used to finish the renovated back seat with an original leather scent
In the shops Gliptone Leather Conditioner & Protectant GT11 ↗
 British Auto USA· $22.00 USD
Electrical 2
- Driver-side air blower motor
Stripped, cleaned of water damage and corrosion with a wire brush, tested and reinstalled
In the shops Heater Hose, Driver Side ↗Flyin' Miata· $26.99 USDHeater Hose, Driver Side ↗Flyin' Miata· $26.99 USD
 Wiper Blade - Driver's Side ↗British Auto USA· $43.86 USD
- Windscreen wiper mechanism
Removed, cleaned of old grease with diesel, rebuilt with electrical connector reattached first, and regreased
In the shops Driver Side Windscreen Wiper Rubber ↗British Auto USA· $31.32 USD
Photos
40 pictures collected from the write-up, in the order they were posted, shown from My Jaguar XJ6 Series 2 Restoration. A picture opens larger here, with the way through to the page it is on.
How it was done
Interior renewal
Staal rebuilt the interior trim, restoring metal parts with anti-rust primer, fitting a new headlining supplied by SNG Barratt, adding sound-damping carpet (Egalbase), new door and console armrests from Jag Parts & Cars, and a renovated back seat finished with Gliptone leather-smell treatment.
Glass and body rubber
The rear windscreen was removed and refitted, with some rust found and treated with polyester epoxy and rust primer before resealing. Leaks around rear window rubber were also patched with epoxy.
Mechanical and fluids
He performed a full engine, differential and automatic transmission oil renewal with products from Anglo Parts, replaced the oil filter, renewed the leaking brake master cylinder seals and brake-resistant tubing with help bleeding the system, restored the windscreen wiper mechanism, and refurbished the driver-side air blower motor and air filter.
Trim and finishing touches
A chrome fine stripe from Classic Car Parts in Brussels was fitted in place of the original thin gold stripe, with help from Paul Soret's sons. Chrome brightwork was polished using Valma chrome cleaner.
Use and events
Once running well, the car was used for local drives in Brussels, a 750 km oldtimer rally with a friends' group, and later a trip through the Mosel valley in Germany after being re-registered with German plates.
A summary in our own words. The full account, with all its detail, is in the original write-up: read it at My Jaguar XJ6 Series 2 Restoration ↗
Worth knowing
- Attach the wiper's electrical connector before reassembling it, or you will have to redo the job
- Keep plenty of buffer trays ready since the Jaguar sheds a lot of oil during a fluid change
- Bleeding the brake system after a master cylinder rebuild is easier with two people