Bruce's Triumph TR3A Frame-Up Restoration
 TR3 Restoration Lessons Learned (TR3B project blog)
Read the full write-up at TR3 Restoration Lessons Learned (TR3B project blog) ↗
 Photo: TR3 Restoration Lessons Learned (TR3B project blog)
Balancing and fitting the cooling fan assembly on a Triumph TR3A
Bruce documents building his own static balancing jig to balance the TR3A engine cooling fan and hub assembly, after failing to find a machine shop to do it. He also covers installing a speedi-sleeve on the front hub, fitting the fan assembly back onto the car, and a note on not over-ordering wiring clip sleeves from The Roadster Factory.
Parts used
Parts named as used in the original write-up, grouped the way the Parts page groups them. Where one of the shops we index lists the same thing for this car, it is shown underneath with a link to the shop.
Engine 3
- Timing chain and tensioner
Newly installed along with timing cover before refitting the fan
In the shops Timing Chain Tensioner ↗
 Moss Motors – Triumph TR6/TR250· $9.50 USD
 TR2-4A Timing Chain Tensioner ↗
 TRGB· £4.13 GBP
 Timing Chain Tensioner TR2-4A ↗TRGB· £4.13 GBP
- Speedi-Sleeve
Installed on the front hub over a worn groove to stop oil leaks at the front oil seal, greased before fitting
In the shops Speedi Sleeve, timing cover ↗Moss Europe (UK)· £67.50 GBP
 Speedi Sleeve, differential pinion ↗Moss Europe (UK)· £66.00 GBP
 Differential Pinion Seal Speedi-Sleeve ↗Moss Motors – Triumph TR6/TR250· $68.50 USD
- Dog bolt and shims
Shims used to set dog bolt orientation; torqued to 125 ft-lbs based on Stag bolt spec advice
Cooling 1
- Cooling fan and extender hub assembly
Balanced on a home-built jig and refitted to the engine with lock tabs and thread locker
In the shops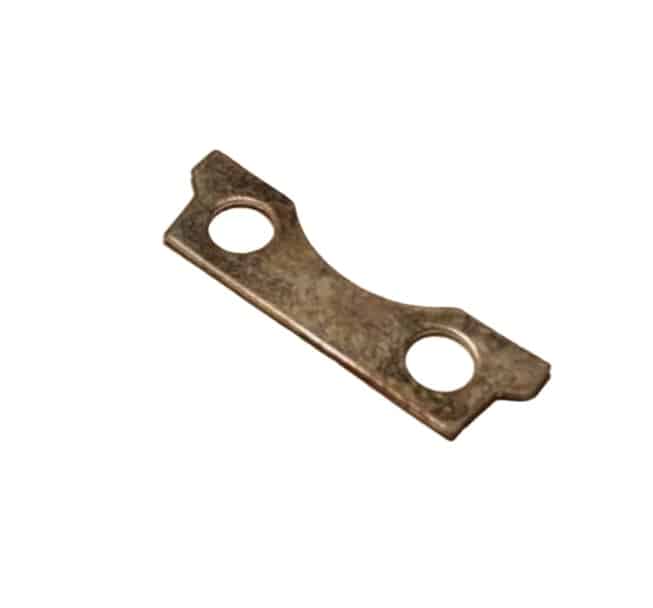 Cooling Fan Lock Tab ↗
 Racetorations· £2.75 GBP
 Fan Hub Extension (TR2-3B) ↗Moss Motors – Triumph TR6/TR250· $55.99 USD
 4-Blade Cooling Fan (Rounded Ends) ↗Moss Motors – Triumph TR6/TR250· $137.25 USD
Electrical 1
- Wiring clip sleevesThe Roadster Factory
4.5 inch sleeves cut into clips for securing wiring, over-ordered for the job
Photos
4 pictures collected from the write-up, in the order they were posted, shown from TR3 Restoration Lessons Learned (TR3B project blog). A picture opens larger here, with the way through to the page it is on.
Balancing, installing the Cooling Fan Assembly on a Triumph TR3A 3this post at TR3 Restoration Lessons Learned (TR3B project blog) ↗
Don’t overorder Roadster Factory Wiring Clip Sleeves for a Triumph TR3A 1this post at TR3 Restoration Lessons Learned (TR3B project blog) ↗
How it was done
Mechanical work - fan balancing jig
With a new timing chain, tensioner and front oil seal installed, Bruce needed to refit the fan assembly. Unable to find a machine shop to balance it, he built a plywood static balancing jig using hacksaw blades as knife edges and tight-fitting sockets as axles, carefully leveled and aligned.
Balancing procedure
He balanced the fan extender hub separately from the fan, adding small washers and nuts as counterweights opposite the heavy side, then assembled hub and fan together and fine-tuned with washers under bolt heads until the assembly swung only slightly rather than dropping to one side. He also added a jig modification with bearings and wire pointers to check for bent blades, and straightened one blade with a wrench.
Installing the fan assembly
Bruce fitted a speedi-sleeve to the front hub to address a worn oil seal groove, greasing it before installation on advice from Wade at The Flying Dutchman water pumps. He removed motor mount shims to clear the crossbar when installing the hub, fitted the correct number of dog bolt shims, torqued the dog bolt to 125 ft-lbs based on advice that it shares the Stag's bolt size, and fitted lock tabs with thread locker before final installation.
Wiring clips
In a short follow-up note, Bruce warns that Roadster Factory wiring clip sleeves come in 4.5 inch lengths yielding three clips each, so ordering 20 for a need of about 15 clips resulted in far more material than needed.
A summary in our own words. The full account, with all its detail, is in the original write-up: read it at TR3 Restoration Lessons Learned (TR3B project blog) ↗
Worth knowing
- Make sure the fan pulley timing hole faces the back of the car, not the front
- Balance the fan extender hub separately from the fan before joining them
- Grease the speedi-sleeve surface before installation so the oil seal does not start dry
- Fit lock tabs and thread locker to the fan bolts only after balancing is finished
- Roadster Factory wiring clip sleeves yield three clips each, so order accordingly to avoid excess