Dana Calef's Jaguar Mark IX repaint and restoration
 Getting Mark IX Ready for the painter
Read the full write-up at Getting Mark IX Ready for the painter ↗
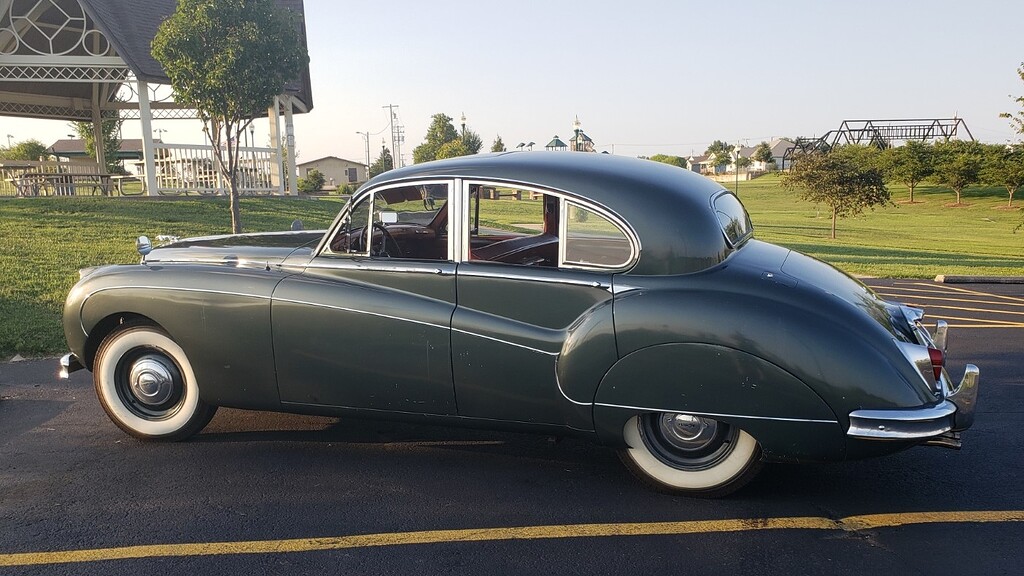 Photo: Getting Mark IX Ready for the painter
A Jaguar Mark IX stripped and repainted black over silver
Owner Dana Calef sent a well preserved Mark IX, originally cream and later resprayed gun metal grey, to a professional body shop to be stripped, straightened and repainted black over dark silver with red interior. The thread follows the teardown, discovery of rust at the headlight pods and sills, and the paint process, with advice from other owners on glass, rubber, headliner and trim details.
Specs
As stated in the original write-up.
- Transmission
- 4L60E automatic (replaced)
- Air conditioning
- Vintage Air system fitted
- Alternator
- Dynomax alternator
- Stereo
- Retro-style stereo and amplifier
- Interior
- Front leather seats replaced, red leather and red windlace planned
- Dash
- Walnut dash restored
- Paint
- PPG black over dark silver metallic, two-tone
- Headliner
- Tan wool headliner planned, to be fitted by professional trimmer
Parts used
Parts named as used in the original write-up, grouped the way the Parts page groups them. Where one of the shops we index lists the same thing for this car, it is shown underneath with a link to the shop.
Gearbox & Drivetrain 1
- 4L60E automatic transmission
Installed as a replacement transmission
In the shops Automatic Transmission, V-12 ↗
 Moss Motors – Triumph TR6/TR250· $0.00 USD
 DG250 Automatic Transmission ↗Moss Motors – Triumph TR6/TR250· $0.00 USD
 Automatic Transmission Filter ↗Moss Motors – Triumph TR6/TR250· $106.77 USD
Body & Trim 3
- Front light nacelles (headlamp pods)Worcester Spares
Rusted originals replaced with longer-style parts sourced for the Mark IX
In the shops Headlamp Nacelle, LH ↗Moss Motors – Triumph TR6/TR250· $399.75 USD
 Headlamp Nacelle, RH ↗Moss Motors – Triumph TR6/TR250· $411.75 USD
 Headlamp Nacelle, RH ↗Moss Europe (UK)· £69.00 GBP
- SillsWorcester Spares
Replaced due to rust found during stripping
- PPG black paintPPG
Used as the top color in the two-tone repaint
In the shops Engine Spray Paint, Black ↗Moss Motors – Triumph TR6/TR250· $19.99 USD
 Black Wrinkle Spray Paint ↗Moss Motors – Triumph TR6/TR250· $17.99 USD
 Hammerite Metal Paint Black 400ml ↗
 TRGB· £10.45 GBP
Interior 3
- Vintage Air air conditioning systemVintage Air
Installed in the car
In the shops Air Conditioning System ↗Moss Motors – Triumph TR6/TR250· $0.00 USD
 Air Conditioning System ↗Moss Motors – Triumph TR6/TR250· $0.00 USD
- Front leather seats
Replaced with new leather
- Walnut dashboard
Restored
In the shops Walnut Dashboard ↗Moss Motors – Triumph TR6/TR250· $526.99 USD
 Walnut Veneer Dashboard ↗Moss Motors – Triumph TR6/TR250· $526.00 USD
 Walnut Veneer Dashboard ↗Moss Motors – Triumph TR6/TR250· $415.40 USD
Electrical 2
- Dynomax alternatorDynomax
Fitted as an upgraded alternator
- Retro-style stereo and amplifier
Installed as an audio upgrade
In the shops 1969 Camaro AM/FM Blue Light Stereo Radio Amplifier Mounting Hardware Kit ↗
Heartbeat City Camaro· 17.16
Photos
84 pictures collected from the write-up, in the order they were posted, shown from Getting Mark IX Ready for the painter. A picture opens larger here, with the way through to the page it is on.
Getting Mark IX Ready for the painter 19this post at Getting Mark IX Ready for the painter ↗
Getting Mark IX Ready for the painter 15this post at Getting Mark IX Ready for the painter ↗
Getting Mark IX Ready for the painter 40this post at Getting Mark IX Ready for the painter ↗
Getting Mark IX Ready for the painter 10this post at Getting Mark IX Ready for the painter ↗
How it was done
Starting condition
The Mark IX was a well preserved original car, repainted once over its original cream without removing trim, leaving scratches and flaking paint. The owner reported only minor visible rust at the front parking light nacelles before starting.
Planning the repaint
After waiting a year for a sought-after painter, the owner decided on a full strip, straighten and repaint in black over dark silver with red interior, having already upgraded the transmission, air conditioning, alternator, stereo, dash and front seats. Forum members advised on two-tone paint lines, glass and rubber sourcing, and door removal risks.
Disassembly and discoveries
The owner removed glass, wood trim, sliding roof, and chrome brightwork, and sent the car for mechanical stripping. More rust than expected was found in the front light nacelles and sills, with replacement nacelles sourced from Worcester Spares along with new sills. Pinholes were found and repaired in the rear spats.
Bodywork and priming
The sills and light nacelles were replaced, rust cut out and new metal welded into the spats, and the bonnet and boot lid primed. The body then went through filler, sanding, guide coat and multiple primer coats before final color decisions on the black and silver combination.
Decisions during the build
The owner considered removing the front wing-mounted mirrors, following suggestions from other members, and ultimately had the mirror mounting holes welded shut in favor of door-mounted mirrors, while keeping the fog lights.
Completion
After about four months at the body and paint shop, Ballard's, the finished car was delivered to the owner, who described the paint and overall finish as excellent.
A summary in our own words. The full account, with all its detail, is in the original write-up: read it at Getting Mark IX Ready for the painter ↗
Worth knowing
- New replacement front windscreens and rubber seals often do not match the original fit
- The front light nacelles and sills can hide more rust than is visible from outside
- It is worth deciding on wing-mounted versus door-mounted mirrors before paint since mirror holes can be welded shut