A 1970 Capri 1600GT XLR Restoration
Restoration Project – Capri Mk1 Owners Club
Read the full write-up at Restoration Project – Capri Mk1 Owners Club ↗
 Photo: Restoration Project – Capri Mk1 Owners Club
Rebuilding a rotten 1970 Capri 1600GT XLR from a bare shell
A long-time Mk1 Capri owner documents the restoration of a 1970 1600GT XLR, bought in 2008, stripped to a shell and found to be far rustier than expected. The write-up focuses on sourcing scarce parts in advance, the body shop's stripping and panel repair work, and the many hidden problems uncovered as paint and panels came off. It is a useful warning to anyone assuming a "project" Capri will be an easy restoration.
Specs
As stated in the original write-up.
- Model
- 1600GT XLR
- Year
- 1970 (J plate)
- Original colour as bought
- Tawny
- Intended colour
- Pacific Blue
- Mileage at purchase
- 283,000 miles
Parts used
Parts named as used in the original write-up, grouped the way the Parts page groups them. Where one of the shops we index lists the same thing for this car, it is shown underneath with a link to the shop.
Body & Trim 8
- Driver's side A-post and full outer sill panelEx-Pressed Panels
Pattern panel fitted to rebuild the driver's side structure
In the shops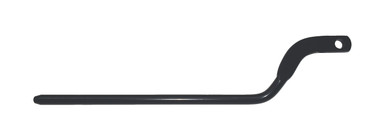 Visor Outer Mounting Bar, Driver Side (TR6) ↗
 bpnorthwest.com· $11.69 USDDriver Closing Panel ↗
Motaclan Limited· £0.00 GBP
Driver Closing Panel ↗ - Front lower valanceFord
New Ford panel clipped into place to aid alignment during rebuild
In the shops Rear Lower Valance ↗
 Moss Motors – Triumph TR6/TR250· $315.59 USD
- Replacement front door (facelift type)
Sourced to replace driver's door, which had severe hinge-edge rot
- Rear valance
New panel sourced to replace heavily pitted original below the bumper line
- Donor car interior parts
Seats, carpet, parcel shelves, dashboard, clock binnacle, centre console, rear and front door cards salvaged from a donor vehicle
- Flat bonnet
Standard (non power-bulge) bonnet salvaged from the donor car to replace the car's earlier-fitted 3-litre power bulge bonnet
- New headlamp mounting panels
Fitted to help align the front end during rebuild
- New wing rails
Fabricated where inner and outer wings meet
Photos
40 pictures collected from the write-up, in the order they were posted, shown from Restoration Project – Capri Mk1 Owners Club. A picture opens larger here, with the way through to the page it is on.
How it was done
Gathering parts before the car
Knowing Mk1 Capri parts were scarce, the owner began collecting wings, valances and arch repair sections over a year before finding the project car. A near-perfect donor interior was sourced separately, though that donor's own floor and front crossmember proved too rotten to use as the base car.
Finding and buying the car
In late 2008 a 1970 1600GT XLR on a J plate was found in Tawny rather than the desired Pacific Blue. It had been off the road about two years, ran roughly with a noisy gearbox, and was collected by truck. Front seats were given up as part of the deal, keeping only the driver's seat.
Stripping and initial assessment
The car was stripped inside and out before going to the body shop, which quickly removed the engine, gearbox, suspension, doors and front wings. This revealed extensive rust, including a badly corroded front floor traced to long-term water ingress at the scuttle corners, previously packed with expanding foam by an earlier owner.
Uncovering earlier poor repairs
The car had been restored around 1990 after apparently being written off in a ditch, receiving a new wing, valance, bonnet (a non-standard power-bulge bonnet) and respray. Rotten A-posts and sills were found, and a prior rear arch repair had distorted the body line rather than preserving original panel.
Further rust and panel sourcing
Stripping to bare metal revealed more rust: rear arches, chassis rail end, a pitted rear valance and rot on the driver's door hinge edge. Replacement A-post, sill and door panels were sourced, with the sills and A-posts bought from Ex-Pressed Panels.
Body rebuilding begins
Repairs started on the front offside and worked around the car. The distorted rear arch line was corrected, a new Ford front lower valance and headlamp panels were fitted for alignment, and the driver's side A-post and full outer sill were fitted using pattern panels, with one panel later proving problematic on the opposite side.
A summary in our own words. The full account, with all its detail, is in the original write-up: read it at Restoration Project – Capri Mk1 Owners Club ↗
Worth knowing
- Rust visible at the scuttle panel corners usually signals far worse hidden corrosion underneath, not just a minor early warning
- Facelift and pre-facelift Mk1 Capri doors look alike but have different internal opener fittings and door card clip holes
- Gathering scarce parts well before buying a project car is worthwhile since unneeded parts can usually be resold
- A poorly done rear arch repair that removes too much original panel can distort the body line rather than preserve it